

How to Install Seed Boot Pivots
Red E
November 8, 2022

Tools Required
- High Quality Drill
- 5/8” Drill Bits – USA Made
- Red E Seed Boot Pivot Guide Block Kit (Part number: AG-K13)
- Ratchet or Impact (Optional)
- 5/8” or M19 Socket*
- 11/16” or M19 Wrench*
*Dependent on whether supplied with standard or metric bolt kit
Design Characteristics
- Precision machined stainless steel bushing for longer life & corrosion resistance
- Grade 8 hardware for longer life
- Grade 8 seed tube bolt with pre-applied anti-seize included
Step-by-Step Instructions
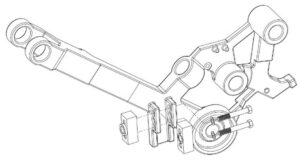
Excessive vertical play at the end of a seed boot affects seed depth placement and germination consistency. Red E’s Heavy Duty Extended Wear Seed Boot Bushing Kit (AG-K13) allows for the rehabilitation of worn seed boot pivots and results in a seed boot pivot tighter than factory new row units. Vertical up and down movement or play of more than ¾” at the end of the seed boot indicates the pivot and/or seed boot has worn significantly and needs to be fixed. A drill guide block kit (AG2046) should be used when drilling out row unit casting holes to ensure the proper alignment of boot to disc is achieved after drilling.
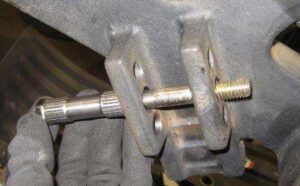
- Remove gauge wheel, disk and seed boot
Remove gauge wheel, disc, and seed boot to allow proper access to boot pivots.
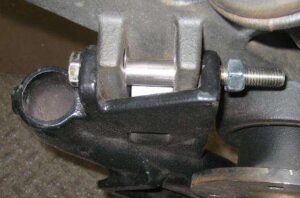
NOTE: Seed boots can be heated around seed tube bolt location to aid in removing difficult and seized seed tube bolts. - Install drill guide block
Install drill guide block as shown. Tighten bolts until snug. DO NOT over-tighten as overtightening can cause drill bushings to be misaligned and make drilling the hole very difficult.

- Apply cutting fluid
Apply a generous amount of PB Blaster, WD-40, or similar cutting fluid to the inside of the holes to be drilled.
- Drill holes
Align drill bit to drill bushings. Set drill to slowest speed and maintain a consistent feed rate while drilling. It is very important to apply force to the drill in a straight manner to not side-load the drill bit and make drilling difficult.
NOTE: Select a heavy-duty drill and drill bit. We recommend a DEWALT Model DWD210G or DWD216G 10 Amp 1/2-inch chuck drill, or similar, and a high quality 5/8” drill bit such as Red E’s custom 4 flute bit, a Champion Cutting Tool BlackGold XG12-5/8 bit, or similar. Under extreme and difficult situations, a 9/16 drill bit can be used to pre-drill the hole to ease the final drilling with a 5/8 drill bit.
NOTE: When drilling, it is recommended to position yourself behind the row unit and pull the drill toward you while drilling the hole. - Complete next row
Remove drill guide block and move to next row.
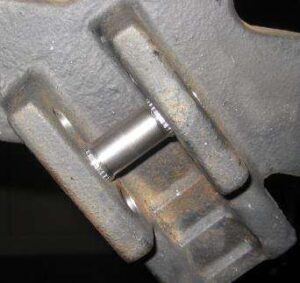
- Place bushing in drilled hole
Drive bushing into drilled hole. A bushing driver or extra bolt can be used for driving in all bushings to protect the bushing during install. Do not pound directly on the bushing face with a hammer.

When installed, bushing should be centered between cast arm flanges and flush with the outside flange faces as shown below.
NOTE: Apply anti-seize with pipe brush to inside of boot bushing before installing boot bolt. - Assemble seed boot and spring with new hardware
Assemble seed boot and boot spring along with new hardware. Ensure seed boot pivots and functions properly, and that all components are installed.

NOTE: Complete 1 row of drilling, bushing install, and complete re-assembly of row to verify final fit and proper function before proceeding with rest of machine row drilling. Red E 4 flute drill bits can be carefully resharpened by hand in the event tip becomes chipped or dull.
Category: Air Drill Parts
Tags: